Step1


The iPhone 5 is here, and it brought along the big guns.
4" 1136x640 pixel (326 ppi) Retina display
Apple A6 system on a chip (SoC)
8 megapixel iSight camera
8-pin Lightning connector
4G LTE connectivity
iOS 6
Step2

The most obvious alteration to the bottom of the phone is the exchange of the large 30-pin dock connector for the diminutive Lightning connector.
The headphone jack is now on the bottom of the iPhone, right next to the updated speaker microphone grille—a series of holes rather than a mesh-covered slot.
Step3

Pesky pentalobe screws! Good thing our 5-Point Drivers still work on them.
It's incredibly convenient that Apple used the same pentalobe screwhead that they've been using for the past two years on the iPhone 4 and 4S. The screw shafts are slightly different from the screws in our iPhone 4/4S Liberation Kit.
Step4


What's this? A suction cup? We haven't needed a suction cup to get into an iPhone since the 3GS!
Because the iPhone 5 is opened front-to-back, replacing a cracked screen is going to be easier than ever. Thank you, Apple!
Step5

The display connector is held firmly to the logic board by a few simple Phillips screws.
Our spudger makes quick work of prying up the display connector
Step6


The iPhone 5 ditches its lid to show us all of the juicy bits inside.
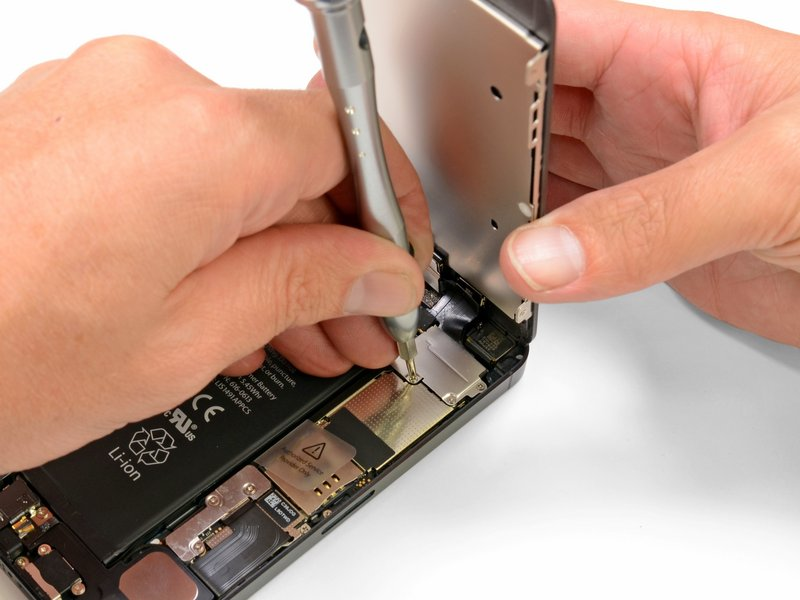
Step 7

Three Phillips #000 screws and a metal bracket hold the battery connector to the logic board.
Step8


We use the Battery removal tab to pull up the battery. Never try to pry soft pack batteries as this could lead to a thermal event!
Step 9


There are all kinds of metal-to-metal contacts inside the iPhone 5.
This contact connects the metal frame around the front-facing camera to the frame around the rear-facing camera.
Speaking of antennas, a spudger easily pries one end of an antenna connector off of the logic board near the battery.
Step 10


Near the top of the case, we find a few antenna connectors firmly screwed to the inside of the case.
Finally free of its constraints, we lift the logic board up out of the rear case.
The logic board and 8 megapixel iSight camera come out together, leaving several components behind in the rear case—another win for modularity.
Step 11

Many of the components that came out with the logic board are held in place with screws and brackets.
Apparently, Apple is very concerned with making sure that all the connectors are firmly seated and won't rattle loose over time
Step 12

The underside of the logic board is teeming with components.
Skyworks 77352-15 GSM/GPRS/EDGE power amplifier module
SWUA 147 228 RF antenna switch module
TriQuint 666083-1229 WCDMA / HSUPA power amplifier / duplexer module for the UMTS band
Step13


After completely dissecting the logic board, we turn our attention back to the rear case.
Not even a healthy heap of adhesive can stand up to our mighty spudger!
The Lightning connector assembly, which includes the headphone jack, loudspeaker, and lower microphone, comes out next.
It appears that the Wi-Fi antenna is also embedded into the assembly.
Step14

The first of three microphones comes out of the iPhone 5 along with the Lightning connector assembly.
It is safe to assume that the microphone located at the bottom front of the device is used for voice commands and voice calls.
The other two microphones remain in the device, for now, waiting towards the top of the phone.
Step15


The Lightning connector looks like it could be swallowed by the the 30-pin dock connector.
Here we can clearly see the eight leads in the new Lightning connector.
Step16

Further investigation into the Lightning connector shows a neat array of pins and a clip to hold the cable in place.
Step17

Even with several components remaining, the back case is impressively light.
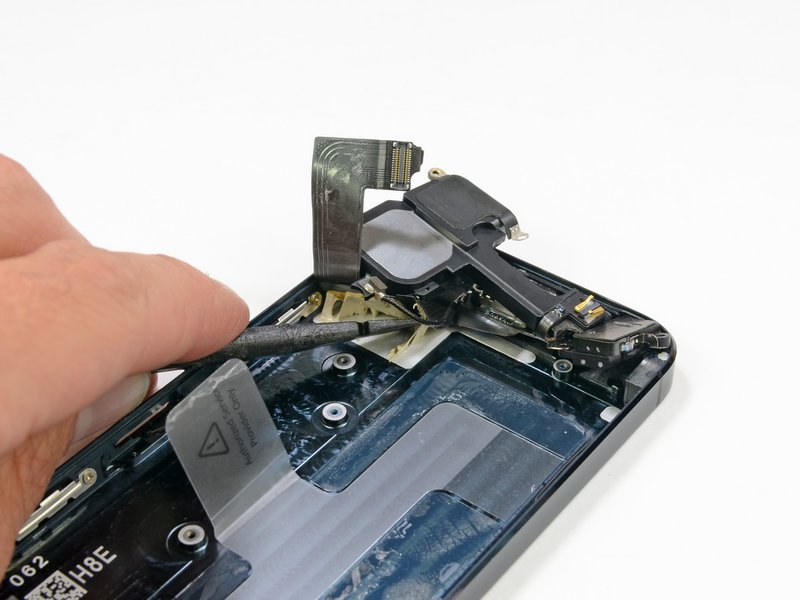
Step18
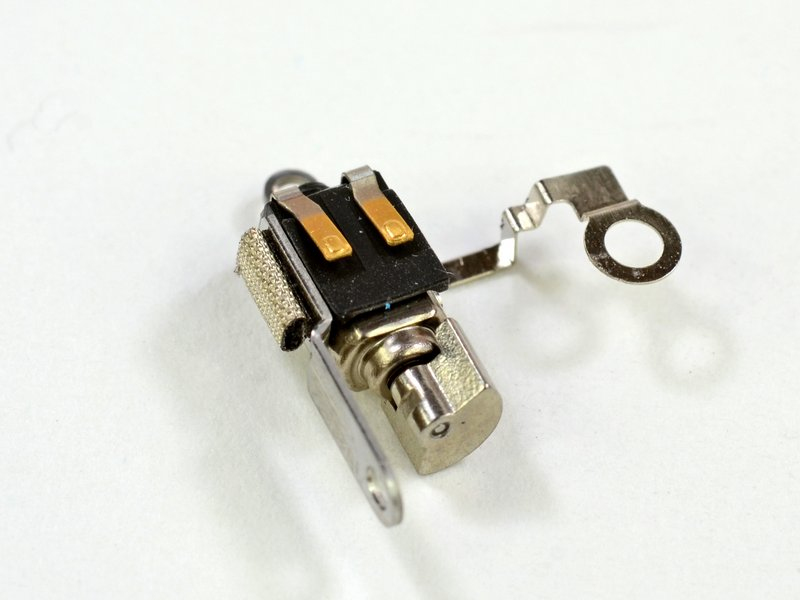
Pressure contacts on the vibrator motor mean that replacing it doesn't require soldering or prying up small connectors.
Step19

The ear speaker comes out easily with two screws and connects to the display assembly with spring contacts.
step20


Apple's newest iteration of its classic home button sports an integrated metal support bracket, which we hope will greatly strengthen the oft-used switch.
step21

What first appeared to be part of the LCD assembly is easily removed after the turn of a few screws.
This plate is likely used for shielding and heat dissipation. The spring contact near the screw suggests that the plate could also be used for grounding.
Step22

One of the iPhone 5's biggest selling points was the updated 8 megapixel iSight camera.
Step23

We have found them! Just as Apple promised, there are more microphones residing in the top of the device.
First, we find the front facing top microphone, presumably for FaceTime and speakerphone capabilities.
And on the back? It's starting to look like a triple microphone! The rear-facing microphone partners up with the rear-facing camera for recording video, and is also used for canceling out background noise when on calls.
Step24

We're quite happy that the glass/display is the first thing that comes off the iPhone 5. The majority of iPhone repairs are due to a shattered front glass.
The battery comes out with a bit of prying once the front panel is removed.
Step25

Paste the above components on the iphone paper. If you are using B6000 glue, you need to place it horizontally for 2-24 hours before framing the disassembled phone.
Download iphone5 teardown template here.

Teardown Tools:https://xreart.com/collections/diy-tools
We are passionate about environmental protection and we're donating 0.5% of your purchase to NGOs like Nature Conservancy, Ocean Conservancy, World Wildlife Fund, and Greenpeace Foundation... We also provide templates and DIY tutorials for any products we sell. We hope everyone can turn their old mobile phones into artwork.


