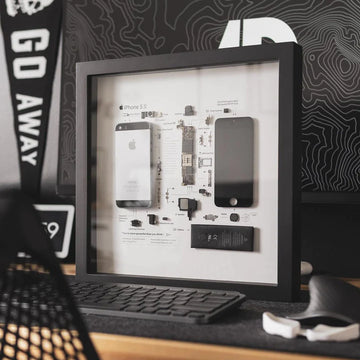
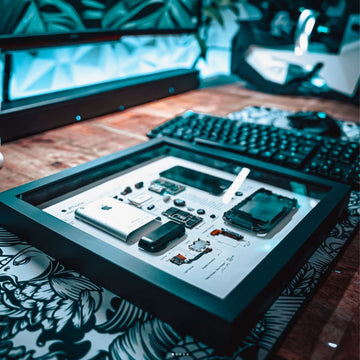
Do you have an old iPhone 3G that is useless but reluctant to throw away? What to do with your iPhone 3G? How about turning it into a framed artwork? You can hang it on the wall, and it will become your exclusive memory.
If you have any interest, here's our tutorial of how to tear down the iPhone 3G.
The iPhone 3G is 4.5x2.4x0.48" (0.02" thicker than the original iPhone), and weighs 4.7 ounces (0.1 ounce less).
With its new rounded back, the new iPhone feels smaller.
The display is 3.5" diagonal, 480x320 resolution for 163ppi.
Step1
Removing the SIM card. 
Step2
Removing the display!
Step3
Rotating the display up.
The camera is located in the upper right corner of the phone. Unfortunately, it connects to the bottom of the logic board, meaning you'll likely need to remove the logic board from the phone to remove the camera. 
Step4
The display assembly separated from the unit.
Step5
We had to remove 6 Phillips #00 screws to separate the glass from the LCD.
The glass (with integrated touch sensors and chips) is underneath, while the LCD is being removed.
Step6
Can you see the 3G bits inside?
The two boards (logic and communications) are now one. They laid it out along the entire length. 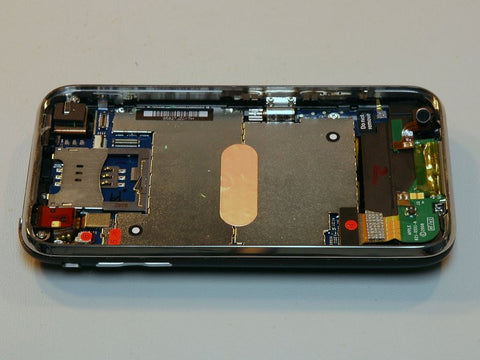
Step7
Let's try removing that.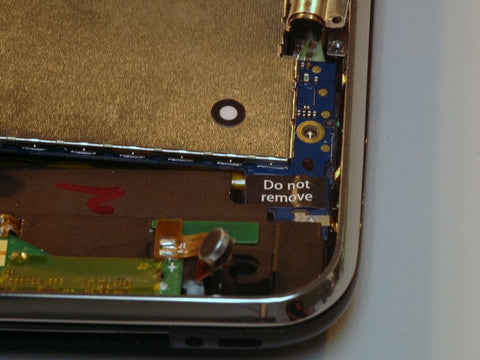
Step8
Look, the battery isn't soldered on!
Step9
Dock and headphone connector.
The primary antenna is on the other side of this part.
Step10
The rear panel remains.
Unlike the metal rear panel on the original iPhone, the rear panel appears to be made from ABS plastic. The coat on the back feels nice and is very reflective, hopefully it's durable as well.
Step11
The battery.Put your soldering irons away, they won't be needed!
Step12
From top left to bottom right: Display glass, LCD, Main board and EMI shield, Antenna and battery, Back panel.

Step13
Now you're almost finished the teardown process, what you need do is to paste the above components on the iPhone layout paper. If you are using B6000 glue, you need to place it horizontally for 2-24 hours before framing the disassembled phone.


